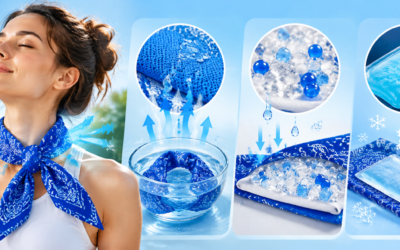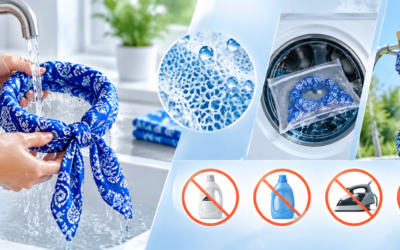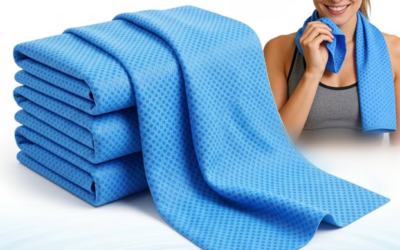
Below, I break down the most effective cooling scarf alternatives, including a couple of DIY neck coolers you can throw together in minutes, and how they stack up against the real thing for lasting relief. Whether you’re stuck mid-hike or trying to survive a power outage, there’s an option here that works.
Wet Towel or Cold Damp Cloth Around the Neck
A plain hand towel and tap water might be the oldest trick for beating the heat, and it still works. Grab a clean towel about 90 x 40 cm, soak it in cool water (around 20°C is ideal), and wring it out until it dampens without dripping. The goal is steady evaporation without soaking through your shirt.
Drape it around the back and sides of your neck. Major blood vessels sit close to the skin there, which is why OSHA lists the neck as a primary cooling site during active heat response. Keep the front of your throat open so nothing feels restricted.
How Long It Actually Lasts
A wet towel requires steady maintenance. One documented heat-exposure protocol re-wets the fabric every 20 minutes with 20°C water. Out in direct sun, wind, or heavy sweat, expect to re-soak it every 10 to 20 minutes once the cloth warms up or dries out.
This brings up the practical divide in the cooling towel vs cooling scarf comparison. A makeshift neck wrap depends on reliable water access and frequent upkeep. Without a water source nearby, the cooling stops, making it hard to rely on during a hike, a commute, or a long work shift without extra bottles on hand.
A damp cloth works well for shade breaks, outdoor labor, and quick bursts of neck relief. It will not match gear engineered for hours of continuous evaporative cooling.
Ice Pack or Gel Pack Wrapped in Cloth

Frostbite from a kitchen ice pack happens faster than most people expect. Direct contact with a frozen gel pack can cause cold injury within minutes, making a protective barrier essential.
Wrap your ice pack or gel pack in a clean dish towel or thin cloth sleeve before placing it on your neck. Skip plastic bags, which do not insulate well enough to shield your skin.
Crushed ice packs cool deeper than chemical gel packs at every measured depth, cloth barrier or not. A thin towel reduces that cooling power, but the layer is necessary to protect your skin.
Timing Matters More Than You Think
Limit use to 15–20 minutes per session, leaning toward the shorter end for children, sensitive skin, or anyone with poor circulation. Wait at least 1–2 hours between rounds, and reapply only after your skin color and sensation return to normal.
Take the pack off if you feel tingling, numbness, or burning, or if your skin turns white, gray, or waxy. Do not rub the area or rinse it with hot water; let the skin warm up at room temperature instead.
An ice pack delivers intense cooling in short bursts, whereas evaporative gear provides steady relief for all-day wear.
Wet Bandana or Cotton Scarf
A folded bandana beats a floppy wet towel for staying power and comfort. Grab a cotton square around 50 × 50 cm, or a longer scarf cut to 100–150 × 20–30 cm if you want to wrap it twice around your neck.
Dunk it in cool water for 30 to 60 seconds so the fibers soak through, then wring it until it is damp rather than dripping. Fold it into a strip about 5–10 cm wide and tie it loosely at the back of your neck, where cooling matters most. Wrapping it around your wrist or tucking it under a cap also works, though your neck gives the strongest heat relief.
Leave the fabric exposed to the air instead of tucking it under a jacket or hat liner. Airflow drives the evaporation that makes the wrap work, using the same principle behind a commercial cooling scarf.
Cotton vs. Synthetic: Which Dries Faster?
Cotton holds more water for longer, making it the better pick for calm, low-wind days when you want lasting dampness. Polyester or microfiber blends dry faster, which suits windy conditions and high-output activity.
Add water every 15 to 30 minutes outdoors, and sooner if it is hot, dry, or breezy. Plain cotton can stay cool for roughly 1.5 hours under the right conditions, but a thin bandana in harsh heat might last only a fraction of that time before it needs another soak.
Spray Bottle Plus Fan for Evaporative Cooling
Pair a fine-mist spray bottle with a standing fan, and you have an evaporative cooling system for your whole body. Mist your forearms, neck, and the back of your knees from 20–40 cm away, keeping water off your eyes, nose, and clothing. Position the fan 0.5–1.5 m to the side, angled so air sweeps across your damp skin instead of hitting the bottle directly.
Spray your skin, let the fan blow across it, and mist again once the moisture dries. Moving air speeds up evaporation, pulling heat away far more effectively than water temperature alone.
How Much Cooling Can You Expect?
This setup drops perceived skin temperature by 2–7°C (4–12°F), depending on humidity and airflow. That delivers solid personal comfort, though industrial evaporative units lower ambient air by 5–15°F in dry climates to cool entire rooms.
Humidity matters here. In muggy conditions, sprayed water sits on your skin without evaporating, so the cooling fades in minutes and leaves you clammy. Save this method for dry, well-ventilated spaces like an office desk near a fan or a semi-open patio.
DIY Water-Bead Cooling Wrap
This takes more effort than a wet bandana, but it gets you closest to a real cooling scarf. Water beads, also known as super-absorbent polymer (SAP) crystals, swell up to 100 times their dry volume once soaked. That holds water against your skin far longer than cotton alone.
Materials needed:
– Absorbent, breathable cotton, flannel, or poly-cotton fabric, cut to 6–7 cm wide and 100–107 cm long
– SAP crystals labeled as “water beads” or “super-absorbent polymer” (skip scented or dyed garden crystals)
– Sewing machine or needle and thread, a funnel, ruler, and clips or pins
Sewing Steps
-
Fold the fabric strip lengthwise with right sides together, then sew the long edge to form a tube about 6.35 cm wide. Seal one end first.
-
Mark 3–4 separate chambers along the tube, each about 20–25 cm long, reinforcing the stitching at each divider.
-
Fill each chamber with 1/8 to 1/4 teaspoon of dry polymer. Do not eyeball larger amounts, or the seams will split once the beads expand.
-
Stitch each divider closed as you go so the beads stay spaced out instead of clumping at one end.
-
Close the final seam with a double straight stitch or bound edge for durability.
First Soak and Reuse
Soak the finished wrap in cold water for 2–4 hours until every chamber feels plump. For more control over fill levels, pre-soak the dry beads in 4–6 cups of water overnight, then load them into the fabric. After use, let the wrap dry completely, then reactivate it with another 2-hour soak.
Store-bought SAP cooling scarves activate in about 5 minutes plus 15–20 minutes of continued absorption. This DIY version takes hours longer to prep, but it gives you a similar 2–4 hour cooling window once soaked.
When DIY Alternatives Aren’t Enough: Heat Safety & Professional Cooling Gear
No wet towel, frozen water bottle, or homemade wrap can stop heat stroke. Learn the warning signs before an emergency happens on site.
Heat exhaustion brings fatigue, headaches, thirst, nausea or vomiting, dizziness, heavy sweating, an elevated body temperature, a fast pulse, and reduced urination.
Heat stroke is a medical emergency. Watch for confusion, slurred speech, seizures, fainting, or loss of consciousness, alongside a dangerously high body temperature, hot skin (whether dry or drenched in sweat), and a rapid, pounding pulse. Severe muscle pain, weakness, or dark urine can signal rhabdomyolysis.
If confusion, seizures, or fainting show up, call emergency services right away instead of waiting it out. Move the person to shade or air conditioning, strip off outer layers, helmets, and extra gear, then start whole-body cooling. Ice water immersion works best. If there is no tub, use a cold shower, hose, wet sponges, or soaked clothing. Cover as much skin as possible with cold wet towels or ice packs, focusing on the head, neck, armpits, groin, and torso, swapping them out as they warm. In dry conditions, wrap the person in a cold wet sheet and run a fan to keep air moving. CDC guidance says to keep cooling until body temperature drops to 101–102°F (38.3–38.9°C). If the person is alert and swallowing normally, offer small sips of cold water. Never force fluids if they are vomiting or drifting out of consciousness. Stay with them until medical help arrives.
Neck coverage alone cannot stop symptoms once they escalate. The CDC, OSHA, and NIOSH all direct response teams toward whole-body cooling for heat stroke.
Where Professional Cooling Gear Fits In

DIY cooling wraps slip, shift, and require constant re-soaking or fresh ice, which wears workers down on a job site. For outdoor construction, logistics, warehousing, road crews, and high-heat production floors, that constant maintenance adds up fast.
A purpose-built cooling scarf, like those from Ice Bear Tech, uses evaporative or phase-change materials engineered to stay cold longer, fit cleanly under hard hats and PPE, and hold up shift after shift without repeated ice runs. These wraps lower heat stress throughout the workday before dangerous symptoms can start.
Conclusion
Heat doesn’t wait for a gear delivery, and you have practical options right in your kitchen. Grab a frozen water bottle for a quick errand or knot a wet bandana before a jog. A DIY neck cooler provides quick relief, but it won’t stay cold for long. Soaked towels dry out, ice packs melt through their cloth, and gel beads warm up right when the heat peaks.
These quick fixes work well in an emergency. If you spend most days out in the sun, look at a cooling towel vs cooling scarf designed for reliable, repeated use.